Better Veggie Burger

Amit Sharma
| 27-08-2025
Burgers don’t always need meat to be satisfying. Today, we’re going to make a veggie burger that’s packed with chickpeas, grains, veggies, and spices—crispy on the outside, soft and flavorful inside.
Whether we're trying to eat lighter or just want something delicious and nourishing, this burger has everything we need. Let’s make it together step-by-step!
What Kind of Burger Are We Making?
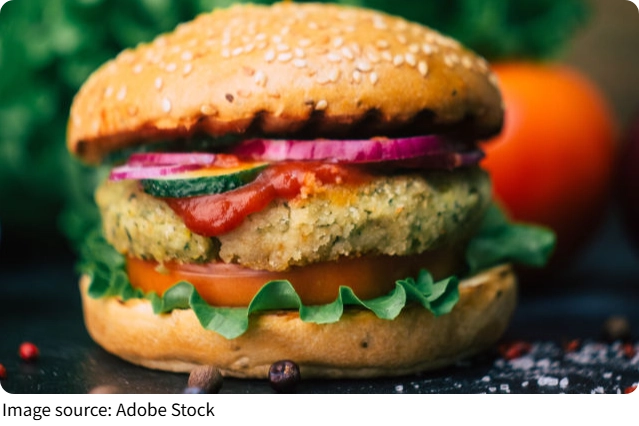
This is a homemade veggie burger featuring chickpeas and brown rice as the base. It’s gluten-free (if we use gluten-free oats or breadcrumbs), high in fiber, and full of texture and flavor. The patty holds together well, fries beautifully, and pairs perfectly with a fluffy bun, fresh veggies, and a tangy sauce.
Ingredients You’ll Need (Makes 4 Patties)
For the veggie patty:
- Cooked chickpeas – 1 cup (about 160g), drained well
- Cooked brown rice – ½ cup (about 100g)
- Carrot – ½ cup, finely grated
- Mushrooms – ½ cup, finely diced
- Onion – ¼ cup, finely chopped
- Rolled oats or breadcrumbs – ⅓ cup (about 30g)
- Garlic powder – ½ teaspoon
- Coriander powder – ½ teaspoon
- Paprika – ½ teaspoon
- Black pepper – ¼ teaspoon
- Salt – ½ teaspoon
- Soy sauce – 1 tablespoon
- Olive oil – 1 tablespoon (plus more for cooking)
For assembling the burger:
- Burger buns – 4
- Lettuce leaves – 4
- Tomato – 1, sliced
- Avocado – 1, sliced
- Pickles or red onion slices – optional
- Sauce of choice – hummus, mustard, or tahini yogurt dressing

Step-by-Step Instructions
Step 1: Prepare the Veggies and Grains
If not already done, cook the chickpeas (or use canned, rinsed and drained), and the brown rice. Finely chop the mushrooms and onion, and grate the carrot.
Step 2: Cook the Aromatics
In a nonstick skillet, heat a bit of olive oil and sauté the mushrooms and onions over medium heat for about 4–5 minutes until soft and slightly golden. This step adds a rich, savory flavor.
Step 3: Mix the Patty Base
In a large mixing bowl, mash the chickpeas with a fork or potato masher. Leave a few chunks for texture. Add in the cooked rice, sautéed veggies, grated carrot, garlic powder, cumin, paprika, pepper, salt, soy sauce, and oats or breadcrumbs. Stir everything together until the mixture holds its shape. If it feels too wet, add more oats; if too dry, add a splash of water.
Step 4: Shape the Patties
Divide the mixture into 4 equal portions. Wet your hands slightly and shape each portion into a round patty about 1.5 cm thick.
Step 5: Chill (Optional but Helpful)
Place the patties in the fridge for 20–30 minutes. This helps them firm up and hold together better during cooking.
Step 6: Cook the Patties
Heat a nonstick skillet over medium heat and brush with a little oil. Add the patties and cook for 3–4 minutes on each side until golden brown and crisp.
Step 7: Toast the Buns
Slice the burger buns and lightly toast them on the pan or in the oven for a few minutes.
Step 8: Assemble Your Burger
Layer the bottom bun with lettuce, add the veggie patty, then tomato slices, avocado, and pickles. Spread your favorite sauce on the top bun and place it on top. Press gently and serve.
Tips for a Better Burger
- Be sure to drain chickpeas well to avoid excess moisture.
- You can make the patties ahead and freeze them — they keep well for up to a month.
- For extra crunch, add some shredded cabbage or cucumber slices when assembling.
- If you like heat, add a bit of chili powder or hot sauce to the patty mix.
Why We Love This Burger
This veggie burger isn’t just healthy — it’s rich in flavor, easy to prepare, and budget-friendly. We can make it our own by switching ingredients or sauces. It’s perfect for a weekend lunch, a picnic, or even meal prep. And best of all, we know exactly what’s going into our food.
Ready to Try This at Home?
Let’s bring this vibrant, plant-powered burger into our kitchen. It’s comforting, flavorful, and totally satisfying — no meat needed. If you try it out, tag your version, share your tweaks, or even let us know what toppings you used. Let’s cook, share, and enjoy every bite together!